
Hello! I’m back with a brand new design today and also, it’s my blog anniversary!
When I signed in to my WordPress account three days ago, I was greeted with a little anniversary trophy and I still can’t believe that it’s been an entire year since I pressed the ‘sign up’ button. A levels are understandably, taking over at the moment but, I still want to try and blog a few times each month. I may not post as much now as what I did last year however, I’m constantly thinking about ideas, designs and posts.
This week my school has been raising money for our annual charity week – a fun filled week for all, while raising a lot of money for charities that are very close to us. My favourite day had to be fancy dress day. I constantly dream about Paris, I Love French, and I go on about it allll the time. So, I dressed up as… an Eiffel Tower! As you do. I was so excited about this and I created a brand new nail design to match. If you want to see my costume, you can view it on Amazon here. If you’re looking for something different to wear this halloween or fancy dress party, I would definitely recommend this outfit! It still looks great with a long black sleeve top and tights underneath, as the weather is getting a little chilly!
So onto the design!

I decided to create a sort of ‘mix and match’ look for these nails. I used a variety of nail polishes, nail art brushes, nail art pens and the paper transfers that I purchased and featured in my holiday post.
Starting with my smallest finger, I just applied 3 coats of my OPI glitter polish from the Mariah Carey holiday collection called, ‘all sparkly and gold’. I love this polish and I think it’s great for the autumn to Christmas season.
Next up, my paper transfer nail! I’ve been really excited to use these and I thought that now was a perfect time to try out the patterned paper.I used the mini french newspaper pattern. I will be doing a step by step post to show you how these work because it took a lot of practice! I applied a base coat and a coat of OPI Alpine Snow. I then used the paper transfer solution and added the paper. I was slightly disappointed with the final look and it took a few attempts to get it right but I’m sure I’ll get better at using these. You can’t really tell that it’s a French newspaper clipping but I still like the effect.
I really like the design on my middle finger. I found a design like this on Instagram but I can’t find the original design owner 😦 If you are the owner or know who the owner is, please let me know so that I can give credit 🙂

It looks pretty complicated to create but it’s actually quite basic! I applied two coats of OPI Alpine Snow (pictured above) and allowed this to dry completely. I then used a blue, pink and green polish and mixed a little bit of nail varnish remover to water them down. I used a square nail art brush and dabbed a bit of colour around the nail – blue at the top for sky, pink for the hot air balloon and green for the trees. I then used a black nail art pen by Essence, to outline the colours. I started at the tip of the nail for the Eiffel Tower, gradually, splitting the line into two and creating a horizontal line just over half way. Refer to the picture above and an image of the Eiffel Tower to create the best shape possible. I also made some random lines to outline some trees, and I outlines the hot air balloon. I feel that this design is really pretty and can be used as just an accent nail or, mixed with other designs, as I’ve done above.
Next, is a design that I’ve adapted. I used an Eiffel Tower nail like this in my previous Paris nail design.
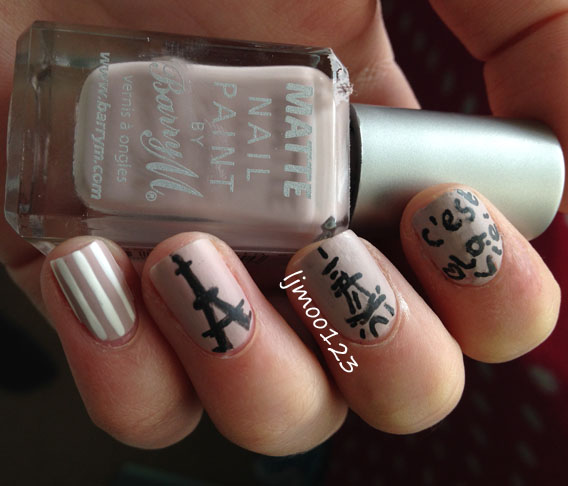
As you can see, I used the design from the second nail but, this time, I added the word ‘Paris’ and a little heart with a nail art pen, and filled in the heart with some red polish and a dotting tool.

Finally, on my thumb, I re-used a quote, again from my previous design. I started with a grey base and used a white Barry M nail art pen to write ‘C’est la Vie’ which translates as ‘that’s life’ or ‘such is life’. It’s a quote which I live by so I love wearing it on my nails.

That’s all for today’s post! This is not the last you’ll read this week because, my born pretty samples have arrived! Be prepared for Halloween designs and reviews!
Thanks for reading and new post soon!

