Hello! I decided not to post yesterday because I really have no ideas for star sign at the moment, so rather than squeezing a bad design out of my brain, I decided to skip it and I may come back to it at the end. Luckily the challenge stretches 5 days into August to catch up!
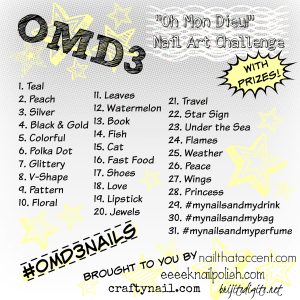
I’ve jumped straight ahead today to day 23 – under the sea nails. I was so excited about this prompt because I’ve never tried an underwater or sea life theme with nails but I’ve seen other bloggers create them and they look so fun! It took me a while to think of a design idea however, I knew exactly what I wanted to do for the background.
I decided to go with a technique which I’ve been wanting to use for a long time but I’ve never been able to get good results. This technique requires a few colours of your choice and a fanned nail art brush which you can probably buy individually but mine came in a set with a few other brushes for under £3 on ebay. You can view a video tutorial on my Instagram page to see how I did it! This is my first video tutorial so please let me know what you think!
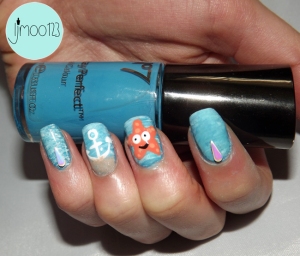
I used mainly No7 polish to create this mani just because the colours were very underwatery. I started with a base colour of ‘stand back’ which is similar to Barry M’s cyan blue although it’s a bit darker and not as bright. I then used the fan brush and added on a white polish (OPI Alpine Snow), an aqua colour (No7 Gel Shine Mint Treat) and a pastel blue colour (No7 Duck Egg – special edition so it may not be available anymore). I added on the polish layer by layer but the trick is to incorporate the dry brush technique in so you don’t overload the nail with thick layers of polish and you can blend it. After applying all of the colours, I quickly added a coat of Seche Vite to smooth them out and blend it a little more. Background mission complete! I was really pleased with the way the base worked out and thought it was a suitable sea look.
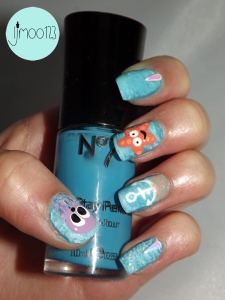
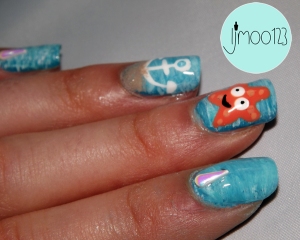
Next up, I added a few extra under the sea elements. On my middle finger, I created a cute little starfish 🙄 Love this little guy. I used an orange polish from Claire’s accessories which doesn’t have a name or colour code 😦 but any orange polish will do! I used a dotting tool to create him because I wanted the star to be quite rounded. I then added two white dots for the eyes, followed by two black dots within these. I added a tiny bit of detail to the starfish using a yellow polish, I added two little dots to each arm thingy. Do starfish have arms? Or are they legs? Tentacles? Anyway. Yellow polish detail was added 😀
On my thumb, I attempted to create a jellyfish… Slight fail but it’s cute to some extent. I used Barry M’s Berry Ice Cream lilac polish and added a large blob on the nail. I then used a nail art brush dipped in a tiny bit of watered-down purple metallic polish and dragged the lilac polish from the blob down the nail while the brush added a bit of sparkle. While the polish was still wet, I added the eyes. This was a sight mistake as they distorted slightly but oh well! I added a little black dot for a mouth and pupils.
I created an anchor on my ring finger using a dotting tool and a white striping tool. I created a white circle at the top of the nail, carried a line down my nail and then added the curve, arrows and little line. I added a smaller circle inside the top one by mixing blue and white polish slightly so that it would blend in with the background. I used a sponge and No7 polish in the shade Beanie and a gold glitter polish to overlap some sand on top of the anchor.
Finally, on my two remaining nails, I added a pretty 3D opal teardrop shape from yes, you guessed it, my Primark nail wheel. I can’t recommend this nail art wheel enough, I’ll definitely be buying another if they’re still on sale.
That is all for today’s post! I hope you like my design, it’s one of my favourites so far! Thank you for reading and be sure to check out the rest of the nails in linkup below! You can also view the video I mentioned and more photos on my Instagram! Just search for @ljmoo123
Stay tuned for tomorrow’s flames post!

